Practical Guide to Recording Thrilling GoPro Videos in Banff
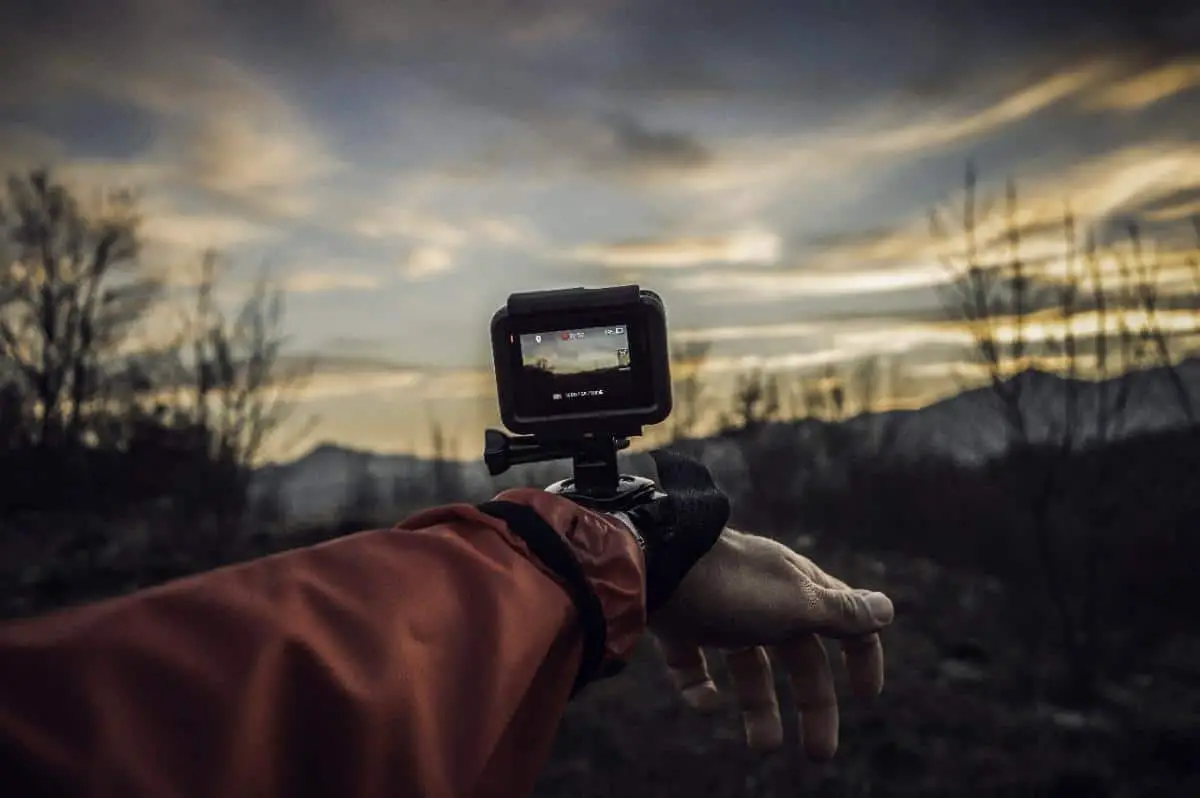
Do you own one of those fancy GoPros or other portable action cameras and planning to visit Banff? The park provides unique opportunities to record breathtaking footage. In this post, I’ll give you tips on where to go and what to expect.
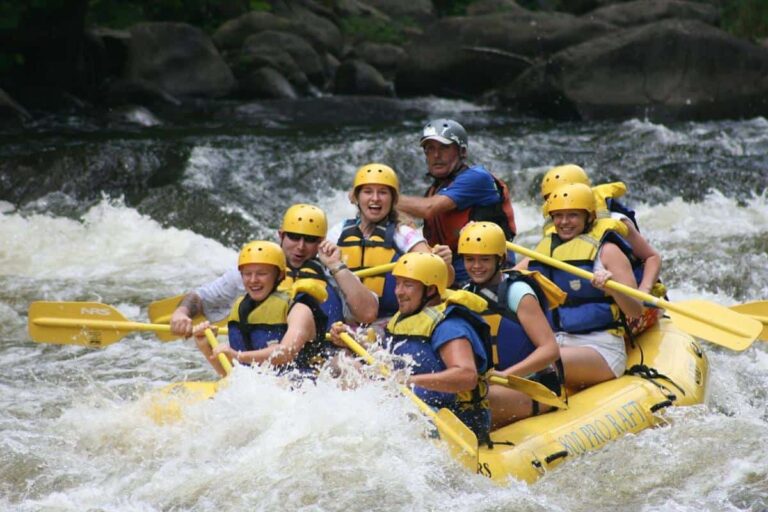
Speeding downhill on your mountain bike, hiking to the summit of Cascade Mountain or Mount Rundle, rafting down the Bow River or skiing down one of the park’s three ski areas. It’s all possible in Banff and these activities are perfectly suited to using a GoPro camera to record your antics. To sum it up: Using an action camera is about capturing the moment in adventurous conditions, unrehearsed and spontaneous.
If you don’t own such a camera yet, an action camera’s small size, low weight and durability make these devices exceptionally well suited to take with you during extreme activities. It’s the very reason why you should consider buying one when you’re about to visit Banff National Park.
How to Instantly Make Your GoPro Footage Look Better?
When you’re out in the park to shoot some fantastic images, you might want to think about how to record your adventure. It’s not so easy to get some spectacular footage.
Here are five quick tips to help you instantly improve your footage:
- Dream up creative angles. Because these cameras are tiny, you can install them in non-obvious places where you can’t put a regular camera or a DSLR. Use your imagination to give the viewer an unexpected perspective. So try not to record at eye level, but get high, low or close.
- If you’re moving a lot (which is very likely during high effort activities), use a stabilizer to record steady shots. Use a monopod or a flexible tripod or whatever suits your activity. If this means you need to hold in it your hands, move smoothly and evenly for good footage.
- Use a wide-angle lens (standard lens on an action camera, so you should be good to go). It’s more forgiving when you’re guessing at your shot, which is the case, of course, when you’re mountain biking or rafting, for instance.
- Shoot in a higher framerate. When you play it back, you can do so in slow motion. When moving, it’ll make your footage look smoother and less shaky. It also makes simple things way more epic. Play around with 120 or even 240 frames per second. The faster the motion, the better it’s going to look.
- Stay close to the action. Any action, drop, jump, or movement will look much more spectacular when you play it back. The closer you are to the action, the more immersive it will feel to the viewer. How you can do this depends on your activity. Be creative. There are always options (even mountain biking or skiing with your GoPro attached to a selfie stick).
What Activities for GoPro Shooting in Banff?
Opportunities for adventure aplenty in Banff. The numerous outdoor possibilities make it easy to find an excellent activity to use your GoPro and shoot that jaw-dropping footage. Some of them might be obvious; others maybe not so much. In any case, I listed them below to inspire you:
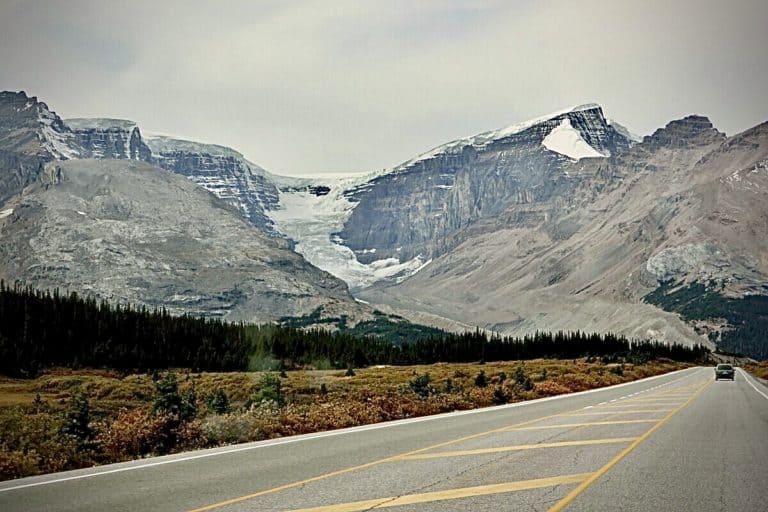
- Driving
- Hiking
- (Mountain) Biking
- Rock Climbing
- Horseback riding
- Helicopter rides
- Boating (on Lake Minnewanka)
- Diving
- Skiing/Snowboarding
- Rafting
- Snowshoeing
- Dog sledding
- Ice skating
- Riding a snowmobile
Below you’ll find options for mounting your action camera in the three most popular activities in the park. Hopefully it’ll help you shoot some amazing footage.
Tips for Mounting an Action Camera for Hiking
Trying to shoot captivating videos with your GoPro partially depends on where you mount your camera. So, what options do you have when hiking?
On Your Chest
Using a chest mount to wear your action camera on your chest works particularly well because you don’t have to hold the camera in your hands as it films the path right in front of you.
- Gear to get: Chest Mount
On Your Shoulder
Another good option is to mount your action camera on your shoulder. It provides a more realistic perspective.
- Gear to get: MegaGear Chest Shoulder Strap Mount
Tips for Mounting an Action Camera on a (Mountain) Bike
Knowing where to put your action camera is especially important when riding a (mountain) bike. Mounting the camera on your helmet generally doesn’t provide the most spectacular images possible, so what other options do you have when (mountain) biking?
On Your Chest
You can mount your action camera on your chest, showing your arms and hands on the handlebar while allowing more stable shots. Make sure you mount your camera upside down to be level when you bend over on the handlebars when riding your bike. Make sure it’s not too high up or too low.
- Gear to get: Chest Mount
Handlebar Mount
You can mount it on your bike’s handlebar. It allows many different angles without unmounting the camera. Turn it in any direction you prefer: like your head, your hand on the handlebar, even facing back.
- Gear to get: Handlebar Mount
On the Seat Stay
You can also mount your action camera on the seat stay, facing forward. This allows for filming your legs cranking the pedals. It will enable you to see the terrain zipping past you while a large amount of your bike is in the shot, making you feel connected to the action.
- Gear to get: MULE Mount
Under the Seat Mount
Using your action camera right under your seat is a less commonly used location, providing superb shots. Like this, you can easily capture someone riding behind you. You can also point it to the rear tire moving up and down on the suspension while absorbing the terrain. It’s an excellent way to capture the action.
- Gear to get: Pro Bike Seat Mount
Tips for Mounting an Action Camera for Skiing or Snowboarding
Knowing where to put your action camera can also make a big difference when skiing or snowboarding. Mounting the camera on your helmet generally doesn’t provide the most spectacular images possible. By the way, make sure you take a spare battery with you, as the cold can significantly decrease the battery life. Alright, let’s have a look at what options you have.
On Your Chest
Like hiking, the chest mount provides an excellent possibility to capture all the action. It shows both your hand and your feet. Moreover, it offers perfect POV shots. It’s much easier to capture ski, slope and panorama shots in the same image than with a helmet mount. You need to be careful with choosing the angle. It depends on your skiing/snowboarding style and your height.
- Gear to get: J-Hook Buckle Mount
On Your Helmet
You can film your skis or snowboard in full action with this mount. Just mount at the front of your helmet and tilt it somewhat downward. Adjust it at the right angle and set it to superview; otherwise your image could be a boring white slope. You can also use a Helmet Extension Mount. This part allows you to film your face and arms, making for unique shots.
- Gear to get: Adhesive Mount and/or Helmet Extension Mount
NB. A pole mount is also a possibility. It allows for following someone and exciting and often spectacular footage, but it takes away from the skiing experience as you mainly use it to get some stunning shots.
What Are Good Shooting Locations?
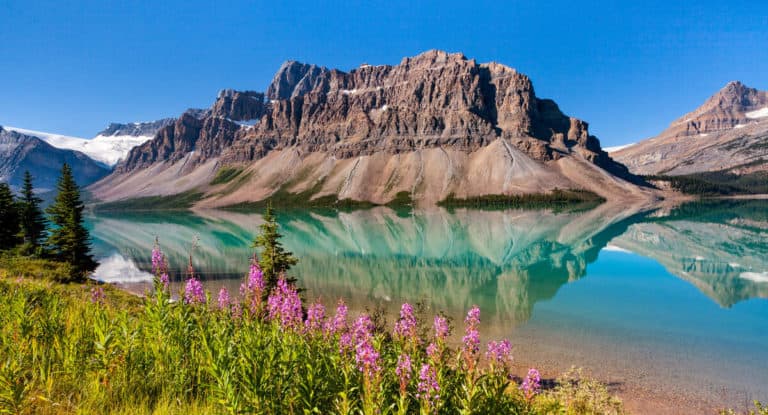
The short and simple answer to this question is: any activity that involves breathtaking scenery (can’t go wrong with that in Banff) and/or speed. The first is easy, the second not necessarily much more difficult. You just rent a mountain (bike) or go skiing/snowboarding and you’ll be guaranteed spectacular footage. I’m sure you’d like to have some specific locations within the park, so here goes:
Hikes
Even though hiking doesn’t go fast, the astonishing vistas you’ll get during hikes in Banff are worth filming with your GoPro. There are literally hundreds of hikes you can do in the park. Below you’ll find a selection of some spectacular hikes that are worth filming.
Cascade Mountain
This hike to the very top of the impressive mountain rising above Banff on the north end of Banff Avenue (2998 meters or 9836 feet) is quite a spectacular hike. It’s not the easiest of hikes, but you also don’t necessarily have to be an experienced hiker. It has forests (warning: there can be MANY mosquitoes), a massive (natural) amphitheater on the backside with giant rocks scattered across the valley, scrambles, snow and a unique view over the Bow Valley and Banff. Highly recommended!
- Trailhead: Mount Norquay gravel parking lot
Rundle Mountain Hike
The things I mentioned above basically all apply to the Rundle Mountain hike as well. Not as high as Cascade Mountain, but probably a bit more strenuous and more difficult. This hike is absolutely worthwhile, providing you with some fantastic views over the Bow Valley and the Town of Banff from yet another angle. If you want to score on YouTube with some extraordinary footage to show how spectacular Banff National Park is, this is the one.
- Trailhead: near the Spray River bridge on the Banff Springs Golf Course
Sentinel Pass Hike
Another biggie, length-wise. This 13.6-kilometer-long trail (8.43 mi) has an elevation gain of a whopping 925 meters (3035 feet), so come prepared (physically). Starting at the stunning Moraine Lake, this trail guarantees you spectacular vistas. You’ll get some sweet previews of the lake in the forest, but a truly beautiful part of the trail begins once you’ve left the trees behind. Lakes, meadows, giant rocks, ice and snow patches (depending on the time of the year) and mesmerizing views over Paradise Valley: plenty to film.
- Trailhead: the path along Moraine Lake’s eastern shore
Big Beehive Trail
Filming Lake Louise sure provides beautiful shots of a magnificent lake, but truth be told, it’s also a bit lame (sorry). Luckily you can also hike up the surrounding mountains and take not-so-obvious shots from the lake. In fact, on the Big Beehive Hike, you’ll get to an altitude high enough to make the giant Fairmont Chateau Lake Louise look minute (the elevation gain is 564 meters or 1850 feet).
The hike is quite long at 10.0 kilometers (6.2 mi) out and back. It’s also moderately difficult and has some strenuous mid-sections. To get to the top of Big Beehive, you need to climb a challenging switchback. Stunning footage guaranteed!
- Trailhead: the lakeshore path in front of the Fairmont Château Lake Louise hotel
Dolomite Pass
This challenging hike on the Icefields Parkway is not for the faint of heart. Also, don’t undertake this hike if you’re not in good condition. The trail is 18 kilometers (11.16 mi) long and takes you a whole morning and afternoon out and back, counting in taking several moments of taking beautiful shots of your adventure.
After a foresty beginning of the trail, it cuts up a pretty steep slope. The beautiful and fun part starts when you hit a vast meadow. After that, you’ll get to beautiful lake Agnes first. Another three kilometers take you to the roof of the valley, allowing for stunning 360° views.
- Trailhead: Across from the Crowfoot Glacier Viewpoint near the south end of Bow Lake
Mountain Bike Trails

Renting a mountain bike in Banff provides you with tremendous opportunities to shoot incredible footage while blasting through the Rockies. There are many trails all over the park. Some are easy, some more difficult. Below you’ll find a selection of some fantastic trails for excellent GoPro footage.
Lake Minnewanka to Aylmer Lookout
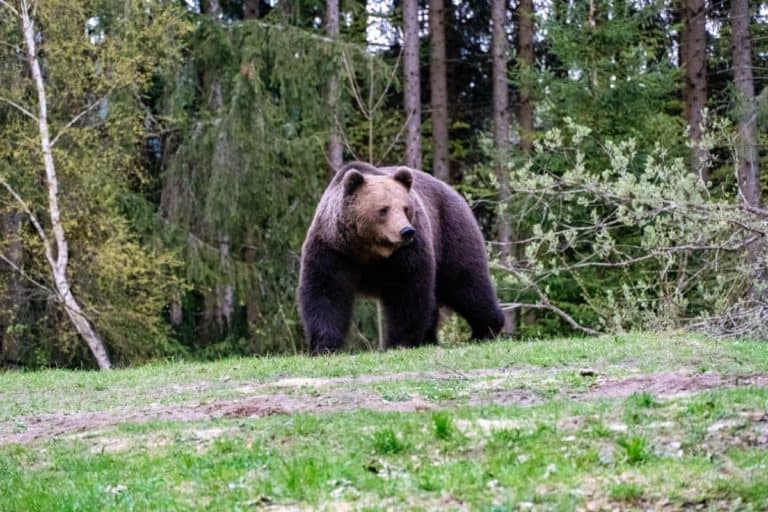
This trail is the only one that takes you to higher elevations around Lake Minnewanka. It brings you everything you can dream of in the Rockies: Stunning vistas, snowcapped peaks, endless forests and wildlife sightings (if you’re lucky, but not uncommon).
Cross a bridge, climb higher and higher and get your award at the trail’s end when you’re treated to an impressive Lake Minnewanka panorama. Be warned that parts of the trail are pretty rocky, requiring quite some effort and skills from you as a mountain biker.
- Trailhead: day-use area of Lake Minnewanka
Rundle Riverside Trail
This spectacular trail along the Bow River near Mount Rundle provides a great spectacle to quench your thirst for adventure and make exciting GoPro videos. At 17.7 kilometers (11.4 mi), it’s a quite long ride. While the course of the trail isn’t necessarily strenuous, you still need to overcome 855 elevation meters. This trail, that connects Banff with Canmore, is surprisingly beautiful and offers spectacular views of the Bow River, continuous mountain peaks, big rocks, a dense forest, and more.
It leads up to the Canmore Nordic Centre where the cross country skiing events took place during the 1988 Winter Games. You can take the same way back or ride the Banff Legacy Trail (see below) that connects Banff and Canmore along the Trans-Canada Highway. Another option is loading your bike onto one of the Roam Transit buses to get back to Banff.
- Trailhead: the back of the Fairmont Golf Course in Banff, near the Bow River
Star Wars Trail
This exhilarating trail is close to the town of Banff and offers a high-quality opportunity for spectacular mountain bike free riding through the Rockies. While this trail is also suited for beginners and intermediate riders, it has several technical sections that can push you to your limits, including a spectacular curved wall and a series of jumps.
It’s a short 2.5 km ride, but its technical challenges make it worthwhile. And most importantly: you’ll get some superb opportunities to shoot some extraordinary action footage in the middle of the Rocky Mountains.
- Trailhead: Tunnel Mountain Drive in Banff (near the Buffalo Lodge)
Stoney Squaw Trail
If you’ve done the Star Wars Trail and looking for even more spectacular filming options while being challenged more, then the Stoney Squaw Trail might be your cup of tea. At 15 kilometers (9.3 mi), this is a longer loop, taking you to the top of the Stoney Squaw Mountain, bordering the town of Banff.
Its twisty, rocky trail makes it technically challenging, but it’s also perfectly fit for some jaw-dropping footage. There’s an upper and a lower part, with the upper one probably being the most interesting because of its more rugged surroundings, though the lower part’s trail is also worthwhile. While they are separate trails, you can connect one to the other.
- Trailhead: past the chalet and first ski lift at Mount Norquay
Legacy Trail
If you want to take it easy and just want to record the beauty of the Rockies, this very scenic trail is the way to go. The trail connects Banff with Canmore and is 22.3 kilometres (13.83 mi) long. It takes you through the town of Banff and through forests, past Vermilion Lakes and the towering Cascade Mountain. The trail has some undulating parts and stunning viewpoints. There are many opportunities to shoot spectacular footage on this easy and well-maintained trail.
- Trailhead: downtown Banff
Tips on Mounting an Action Camera on a (Mountain) Bike
Trying to shoot captivating videos with your GoPro partially comes down to where you mount your camera. On your head generally doesn’t provide the most spectacular images possible. So what options do you have when (mountain) biking?
Skiing and Snowboarding
If you’re an avid skier or snowboarder and want to record some spectacular images with your action camera, Banff National Park is the place to go. The park has three (!) ski resorts: Mount Norquay, Sunshine Village and Lake Louise.
They all provide a perfect opportunity to record your shenanigans on your skis or snowboard. Experiment with the tips I provided above and create the most spectacular images of your fantastic winter sports adventure in Banff National Park.
Buy a GoPro in Banff
So you’ve decided you need a GoPro (or another brand action camera) and want to buy one while you’re on vacation in the park. I suppose you want to know where you can get them and what prices you should expect.
First off, the prices:
As it goes with all kinds of electronic devices, GoPros come in all sizes and shapes. Buying a GoPro camera can be quite an investment. Your cheapest option starts at about CAD 290 up to CAD 650 for the more advanced and luxurious models.
Then there are also the parts you might be interested in. GoPro sells several, like a protective housing case, a suction cup mount, a handlebar/seat post mount, a pole camera mount, a chest mount, a battery charger and SD cards.
The shops:
- The source, 317 Banff Avenue (In Cascade Mall), +1 403 – 497 0001
- UNLTD Skate & Snow, 319 Banff Avenue (In Cascade Mall), +1 403 – 762 3725
Rent a GoPro Action Camera
What if you didn’t bring a GoPro camera and don’t want to shell out a couple of hundreds to get your own? Then renting an action camera is a simple solution.
In Banff, Banff GoPro Rentals started to rent out these nifty action cameras. You can book them on their site. Renting a GoPro starts at CAD 35. You can also rent helmet mounts, SC cards, spare batteries, chesties and a pole mount.
Into rock climbing as well? Check out the post on rock climbing in Banff National Park I wrote.